Google Pixel 8’s groundbreaking Magic Editor redefines photo editing, letting you manipulate reality with just a few taps. But beyond the headline features, mastering Magic Editor truly unveils its artistic potential. This in-depth guide will delve into every trick and tweak, unlocking your inner photo magician.
Getting Started:
Before casting your spells, ensure your Pixel 8 is backed up and Magic Editor is accessible. Here’s how:
- Back up your photos: Magic Editor edits copies, leaving originals untouched. To be safe, ensure your photos are backed up to Google Photos.
- Open a backed-up photo: Magic Editor only works on Google Photos backed-up images. Open the desired photo, tap “Edit,” and then the magic wand icon labeled “Magic Editor.”
The Tools of the Trade:
Magic Editor offers four main tools:
1. Eraser:
- Vanish unwanted objects: Simply brush over distracting elements like photobombs or power lines and Magic Editor will intelligently fill the gap with realistic background.
- Refine your eraser: Tap the wand icon for brush size and hardness adjustments. Smaller brushes tackle intricate details, while larger ones work wonders for broader areas.
2. Object Mover:
- Reposition elements: Tap and hold an object, then drag it to a new location. Magic Editor seamlessly blends the relocated object into its surroundings.
- Fine-tune the move: Pinch to resize or rotate the object for a more natural look. Use caution though,as complex objects might not blend perfectly with resizing.
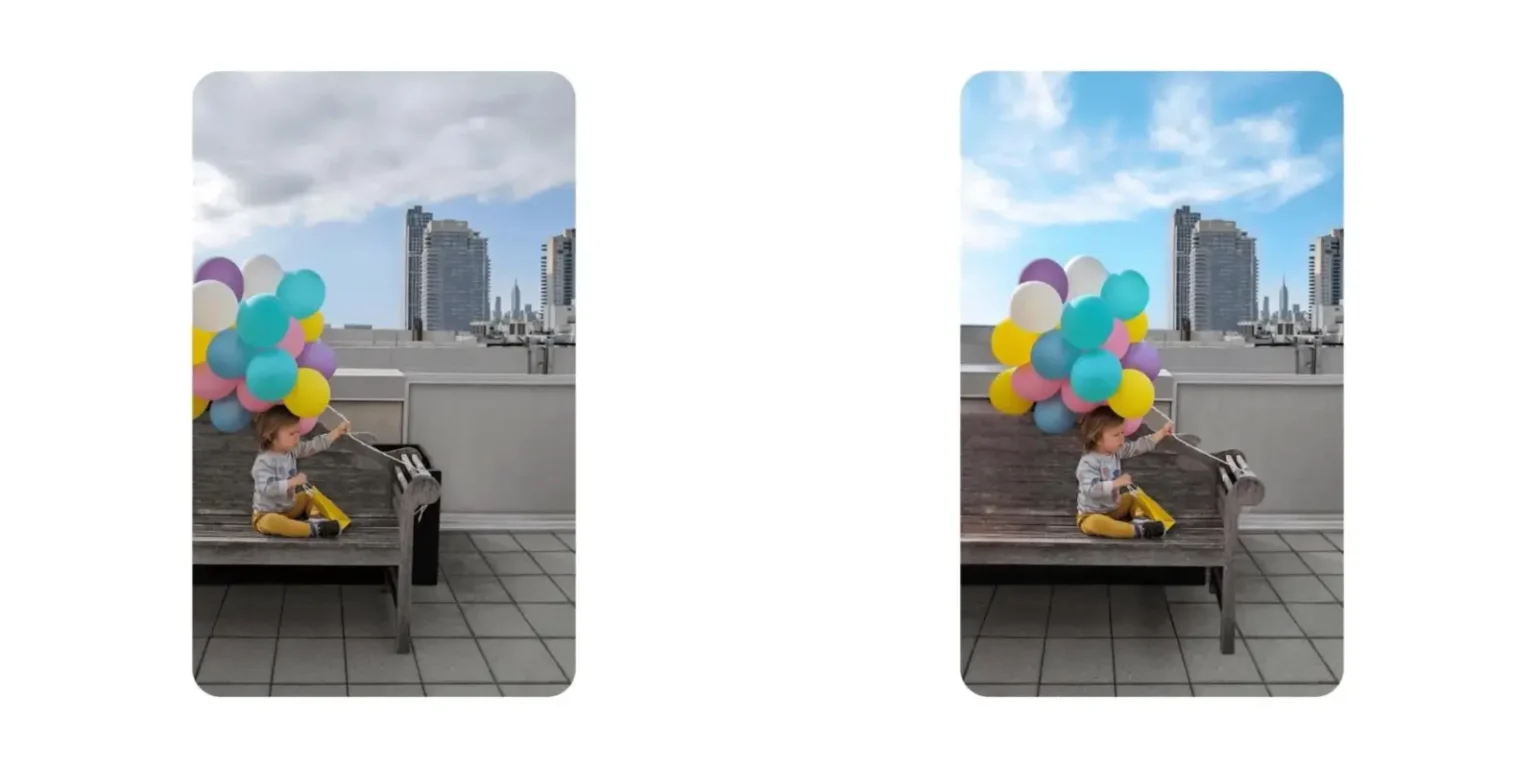
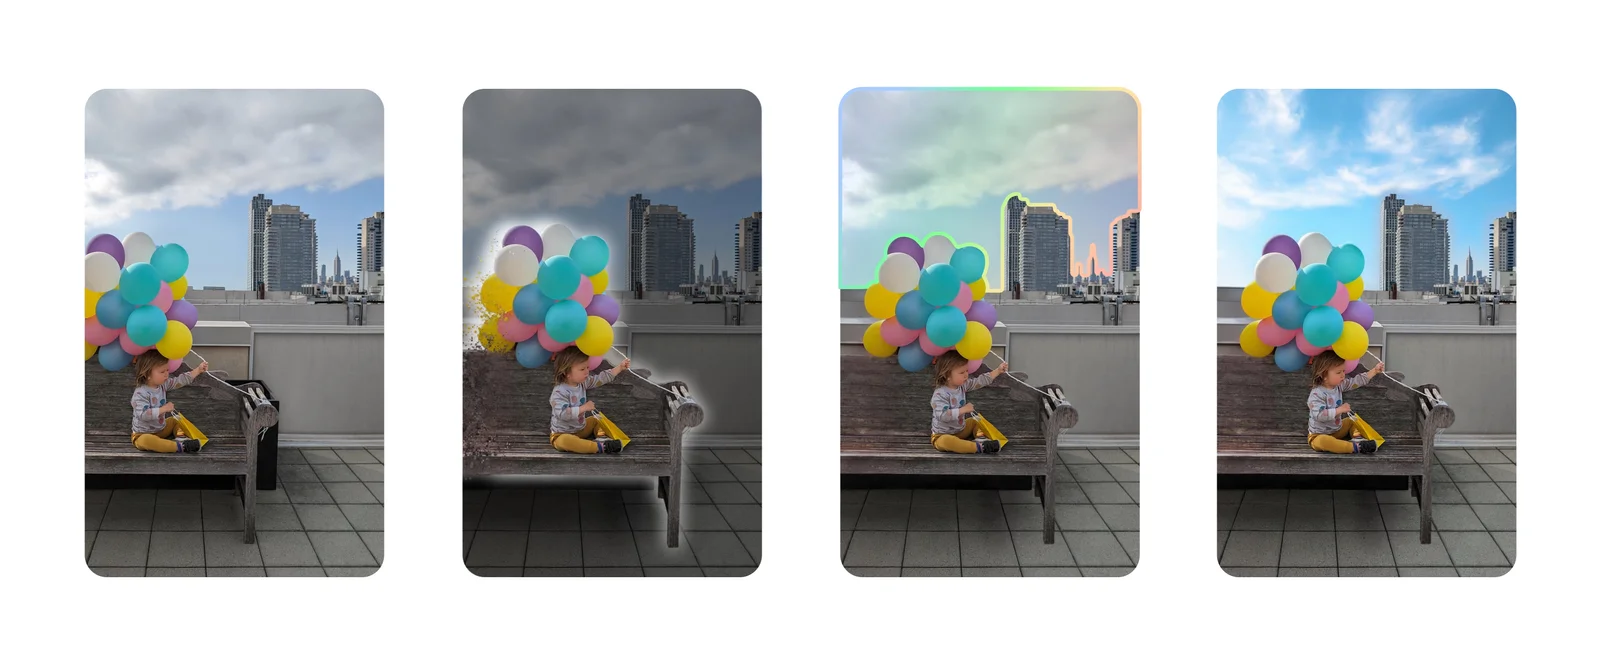
3. Sky Editor:
- Transform dreary skies: Cloudy day got you down? Tap the sky to reveal a menu of vibrant replacements, from sunny beaches to starry nights. Magic Editor seamlessly transitions the sky,matching the lighting and shadows for a believable effect.
- Get creative: Don’t stop at realistic skies! Choose artistic overlays like abstract swirls or dreamy nebulae to add a touch of fantasy.
4. Color Edit:
- Enhance specific colors: Select a color in the photo, then adjust its saturation or hue. This lets you brighten dull flowers, cool down a fiery sunset, or make specific objects pop.
- Go subtle or bold: Use the slider delicately for natural adjustments, or crank it up for a surreal,artistic effect.
Pro Tips for Magical Mastery:
- Light matters: Magic Editor works best with well-lit photos. If your image is too dark or blurry, try editing a brighter version or enhancing the original before using Magic Editor.
- Less is more: Start with subtle edits and gradually refine. Overdoing it can lead to unrealistic results.
- Experiment and have fun! Don’t be afraid to try different tools and combinations. Magic Editor is a playground for your creativity, so embrace the unexpected and see what you can conjure up.
- Share your magic: Once you’ve crafted your masterpiece, share it with friends and family to showcase your editing prowess and inspire them to explore the wonders of Magic Editor.
Beyond the Basics:
Magic Editor offers even more hidden powers:
- Preset filters: Tap the “Preset” button for a curated selection of automatic edits, adding instant style to your photos.
- Undo and redo: Made a mistake? Simply tap the arrow icons to go back or forward in your editing steps.
- Save your creations: When you’re happy with your edits, tap “Save copy” to save the edited version without modifying the original.
Embrace the Magic:
With this guide and a dash of creativity, you’re ready to become a master of Pixel 8’s Magic Editor. Remember, this tool is all about pushing boundaries and having fun. So, dive in, experiment, and unleash the magic within!